
Change motor IDs, baud rate and make their position zero
NOTE: Don't run this step if you have purchased build LoCobot from Trossen, instead follow these steps.
Components Needed
| Component | Quantity |
|---|---|
| Dynamixel Motors | 2 |
| U2D2 | 1 |
| 12V DC Power (comes with arm) | 1 |
| Dynamixel Hub(comes with arm) | 1 |
| Micro Usb Cable (comes with U2D2) | 1 |
| NUC (used in previous step) | 1 |
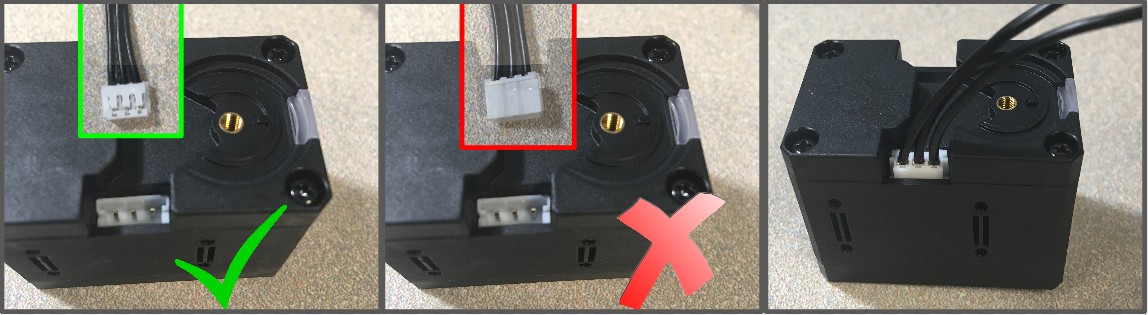
Attach cable to dynamixel motor
NOTE: Attach only one motor
Take out the motor from the dynamixel motor box. It will have a motor, wire & some screws.
First, attach a wire to the motor as shown in the figure below. It can go into the motor
in only one way. The flat end on the female of the wire goes towards the flat end on the male socket
Attach cable to dynamixel hub
Now we are going to attach other end of the above-attached wire to the dynamixel hub that we received with the arm. Over here also note should be taken that wire goes only one way The flat end on the female of the wire goes towards the flat end on the male socket
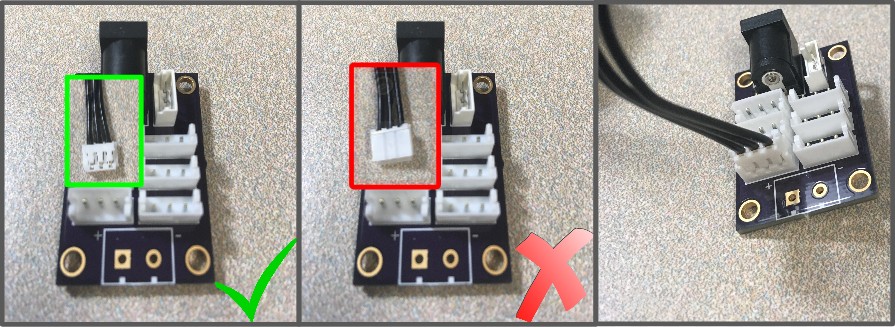
The setup should look like this
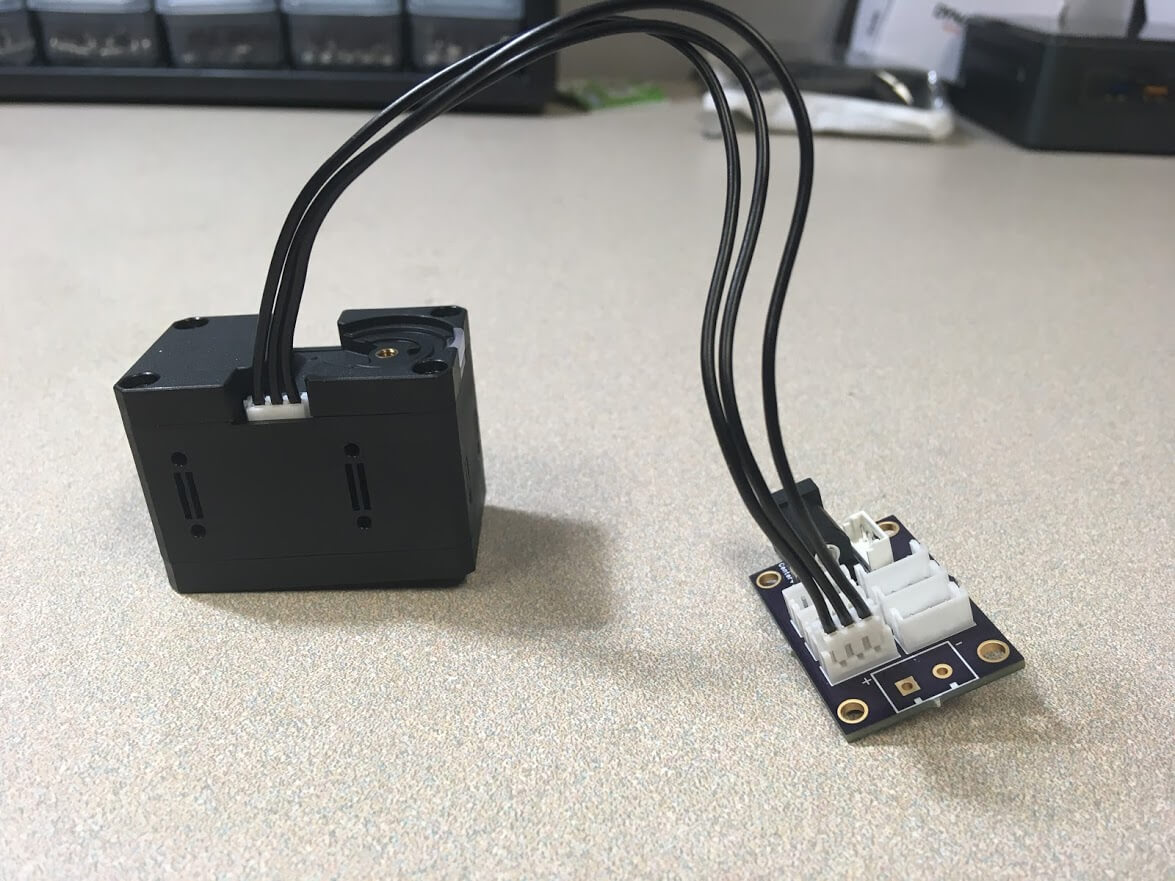
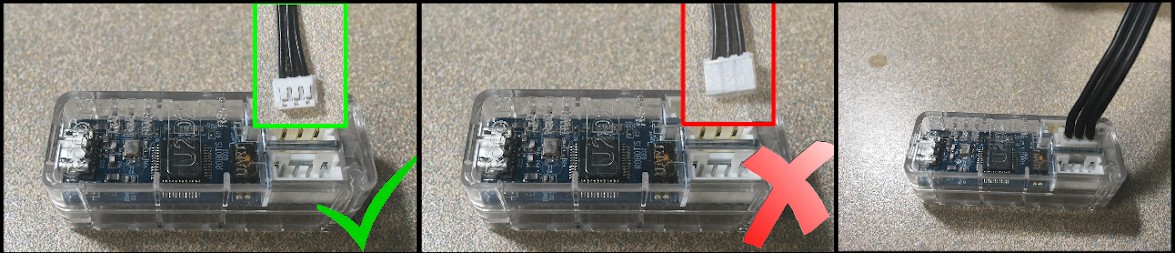
Attach Dynamixel Hub & U2D2
Attach one more wire on the dynamixel hub.You can use the 3 pin wire that came with arm
Attach the other end of above-attached wire to U2D2
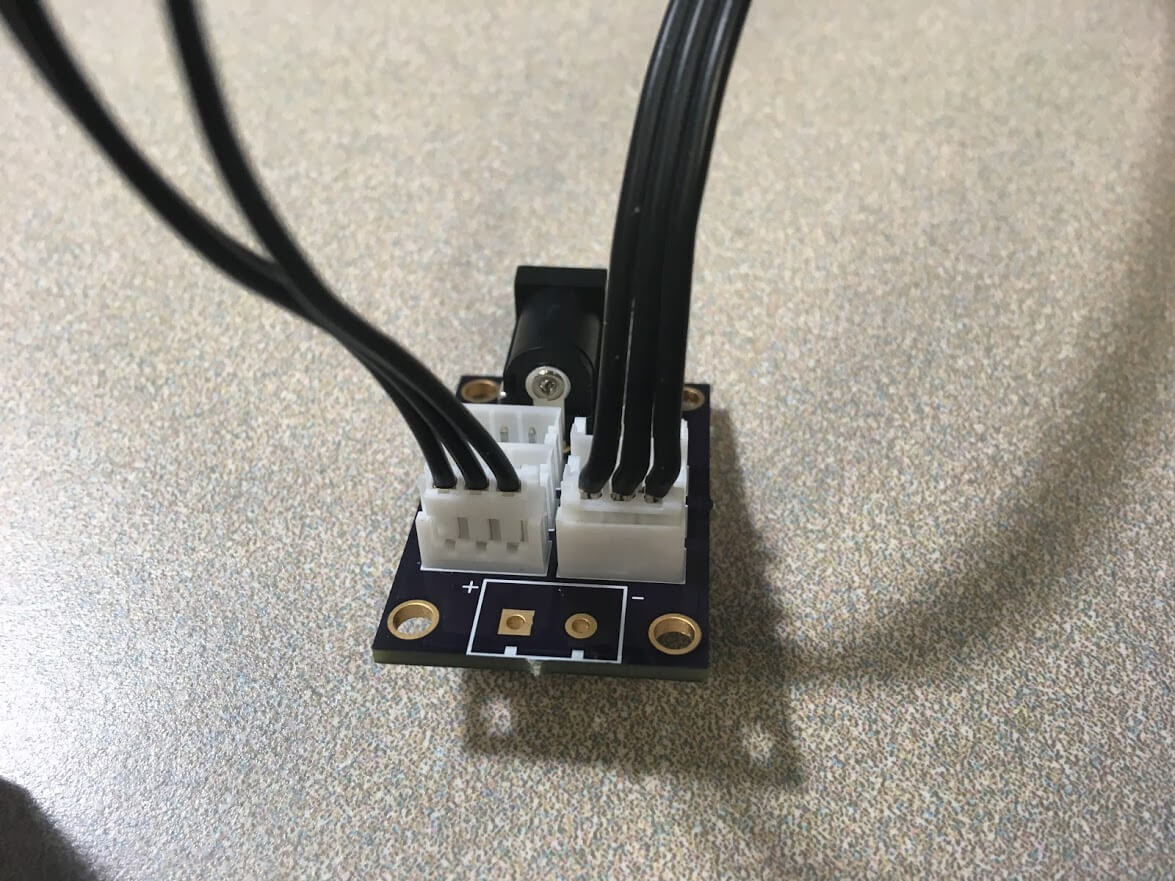
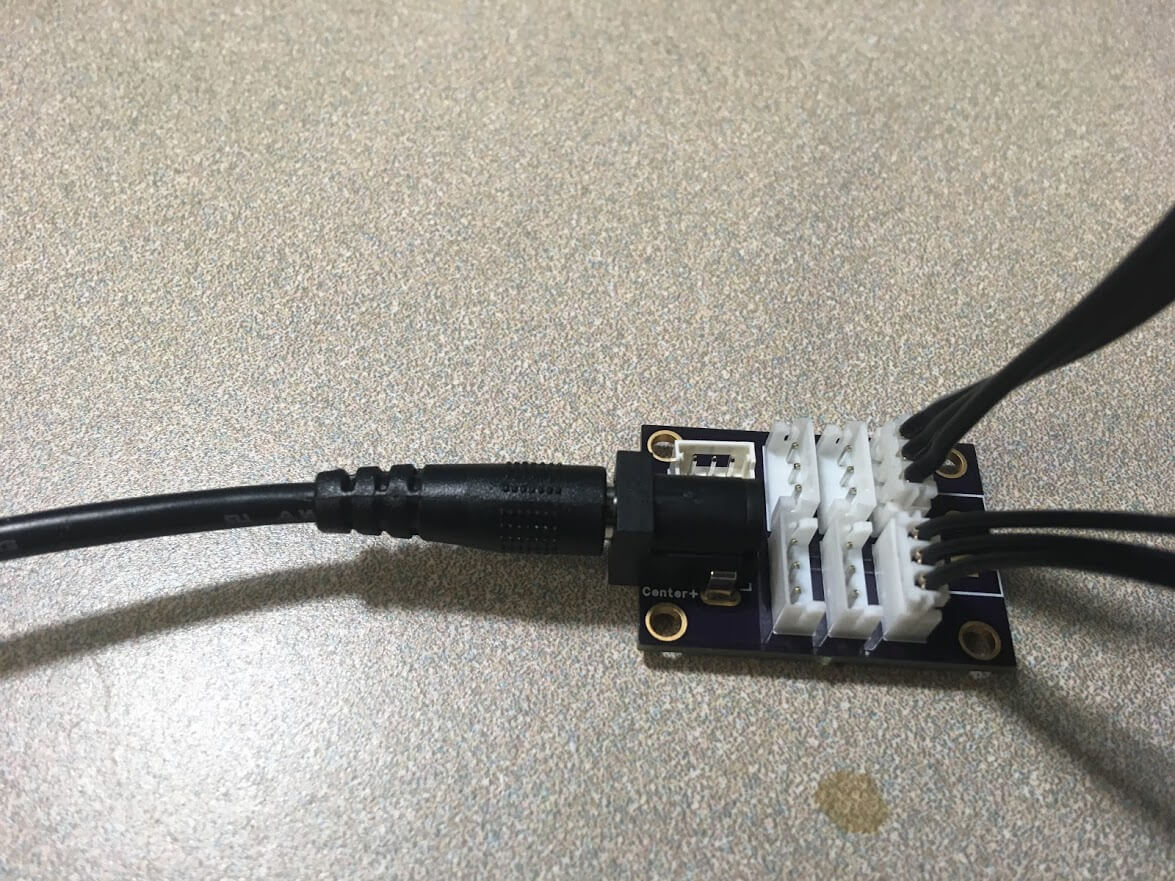
Attach power
Attach 12V power output to the dynamixel hub as shown in following picture. As soon as you attach power, the red led on the back of the motor will blink if the connections are proper. NOTE: Make sure 12V power supply is connected to AC power outlet
Configure Motors
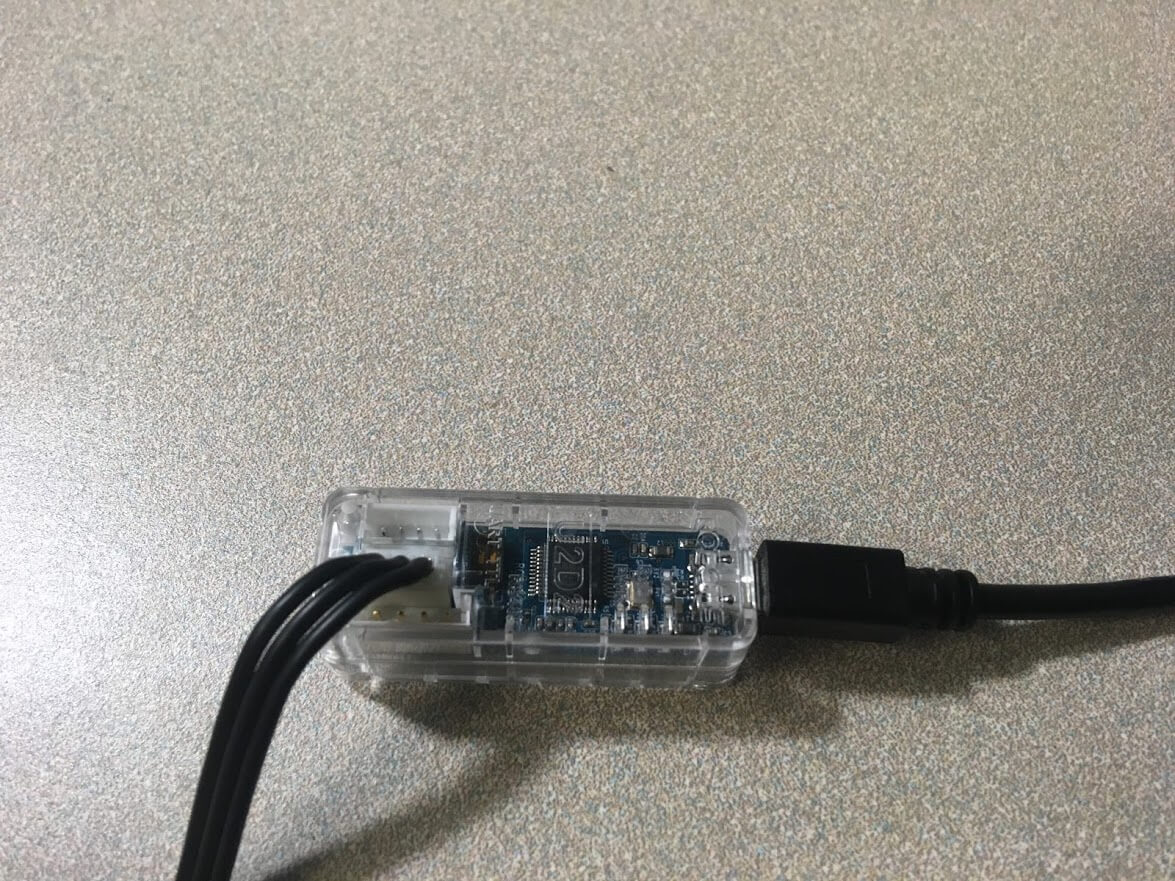
Attach micro USB end of the wire that came with U2D2 as shown in the figure. Attach the USB end to the NUC.
On NUC, after you plug in the USB, you should be able to see ttyUSB_dyna under /dev directory. If it is not there, there is some issue with udev rules
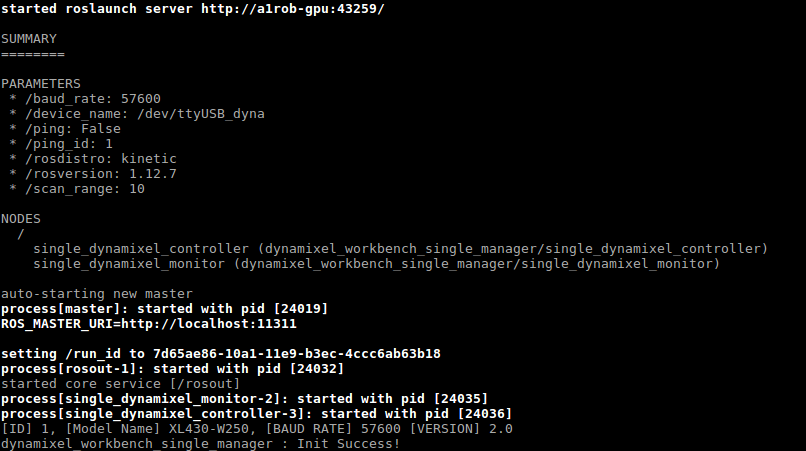
Run roslaunch locobot_control change_id.launch --> It should give you the following output
Press enter after this --> you will see the following output
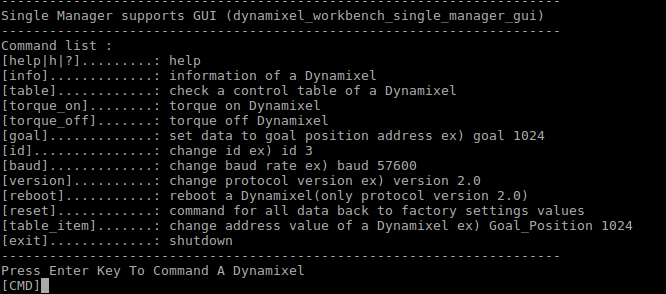
- First, we will change the id. For this type
id 8andenter. You will see...Succeeded to set Dynamixel ID [8]. If you have a permanent marker, write 8 on the motor, so that we can distinguish while assembling. - Press enter to get the menu as above picture. Before running any command you should see
[cmd]this on the terminal. - Type
torque onand pressenter. This will enable the torque on motor. Pressenterone more time to get the menu option. - Type
goal 1024and pressenter. The motor should move after this. Press enter one more time to get the menu option. - Type
goal 0and pressenterto get back the motor in0position. The motor should move after this. Pressenterone more time to get the menu option.[Note: After this don't move the motor shaft, until we mount it on the robot] - Type
baud 1000000and pressenter. This will change the baud rate on which motor will respond. Pressenterone more time to get the menu option. - Type
exitand pressenter.
Similarly, we will try to change the id, baud rate of one more dynamixel. For setting up, we will just have to remove the wire that was going into the previously used motor and attached it to the new motor.
On the NUC side, we will have to follow exactly the same steps as above while doing it. The only change will be one cmd, id 8 from id 9, that we used in 1 point of the previous step